Using a Namecheap domain for a Heroku application
I wanted to learn more about Heroku and use it to build a small site/app using Node.js. Finding my way around Heroku was so-so, but using a custom domain for my app was not as simple.
I started by doing my homework and reading the official documentation but it wasn't as simple as it looked. I tried some alternative solutions, like Zerigo, but some bad reviews found on the net made me change my mind. So I searched for a solution involving my domain registrar, Namecheap. And guess what? There's this really helpful blog post by Sergio Tapia, explaining the process step by step. And based on the info he shared, I was able to get my site up and running, using my custom domain. However, there are two gotchas that cost me some time to figure up so I'm gonna share them as well:
- You need to use Namecheap's nameservers! If you have them pointing to your hosting, use the "Transfer DNS back to us" option, otherwise you won't get access to "All Host Records", where the magic happens!
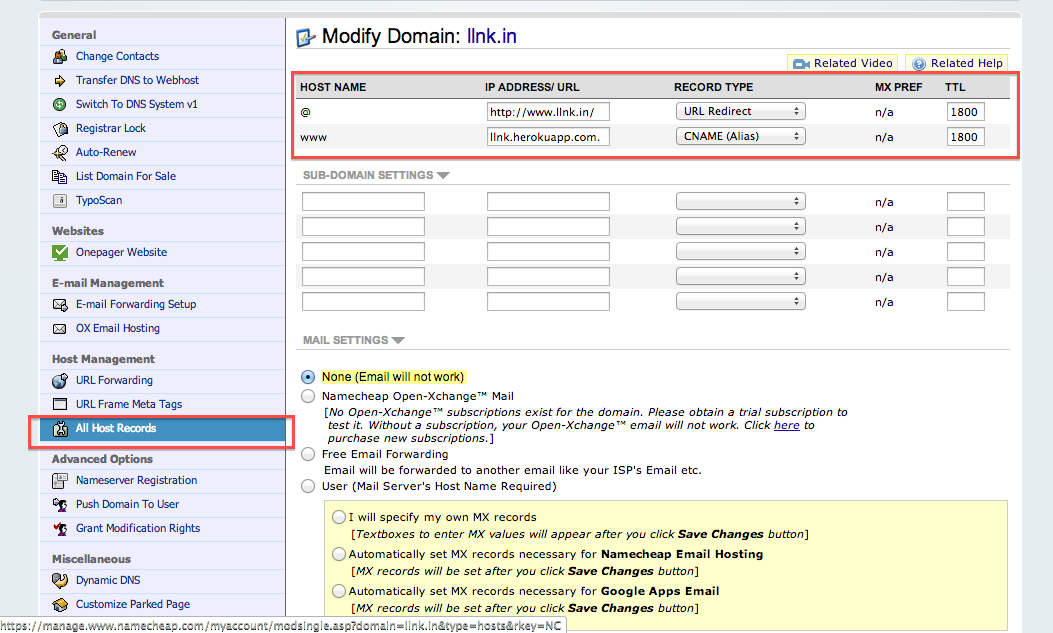
There you need to configure the domain redirection based on your Heroku app's url and then simply save the changes!
- You need to add your domain on Heroku as well! You can either do it from the terminal, or simply use the settings panel of your app.
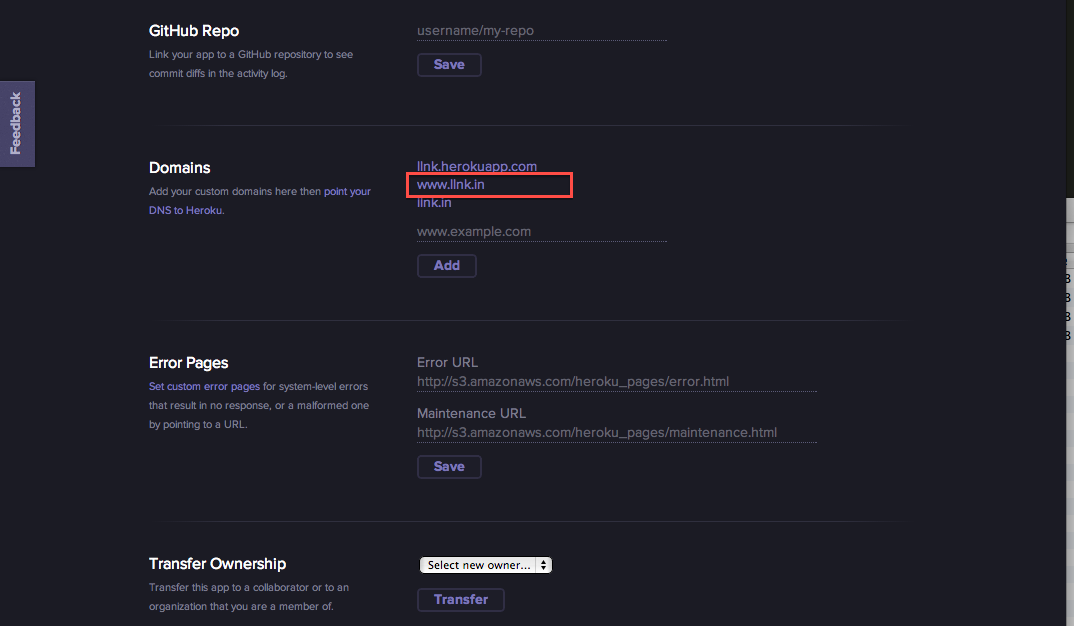
Just be careful to use www. in front of your domain!
The first time I've done it, I set it like "example.com" and every time I tried to go to my custom domain, I got a "Heroku | No such app was found" error message!
And that's pretty much it. Very simple and straightforward. If you're paying attention (unlike me), this whole process should only take a couple of minutes