How to set up an external domain with Hetzner's shared webhosting

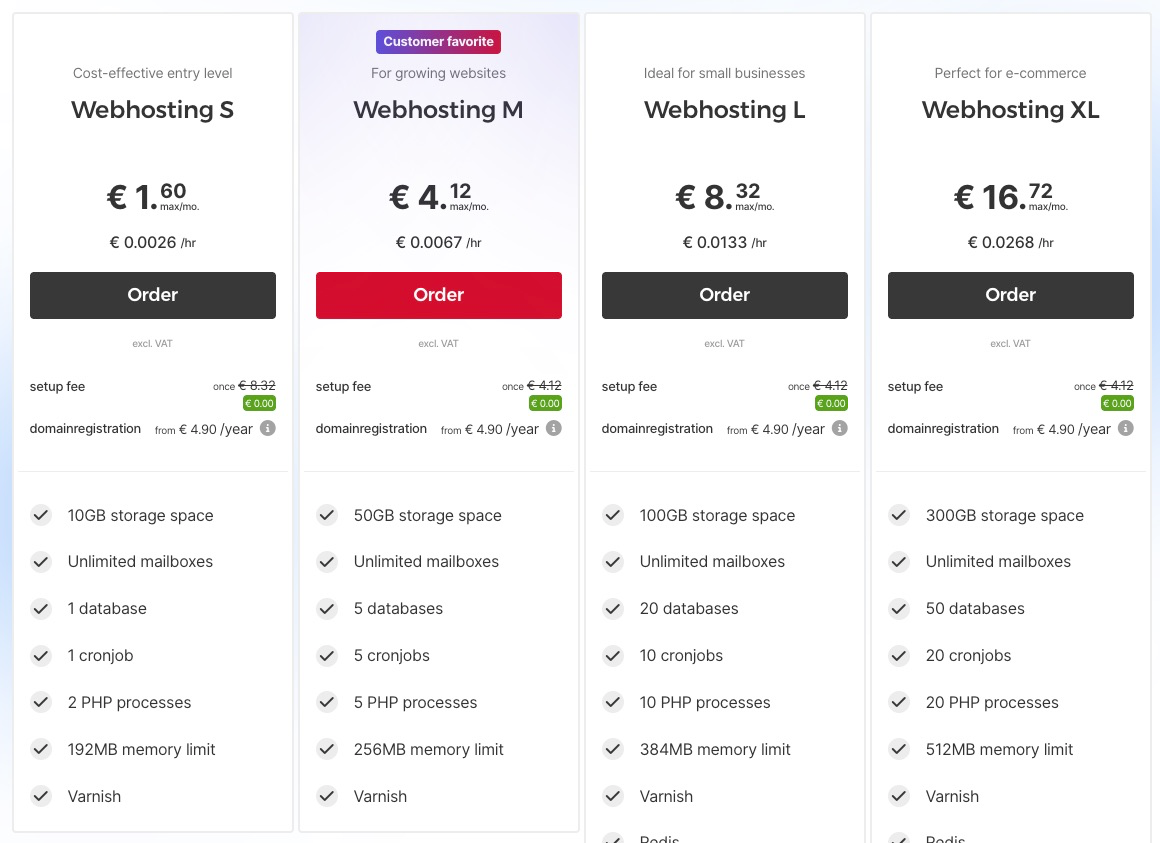
My goal was to create a small blog for someone just starting up: so a cheap Wordpress-friendly hosting that allowed domains from external registrars. As a satisfied Hetzner client, I took a look at what they had to offer and honestly, it looked great: 1.60 euro per month, no setup fee and enough space for someone who's looking to experiment. If things work out, great, you can upgrade to a better tier. If not, you won't have a huge loss.
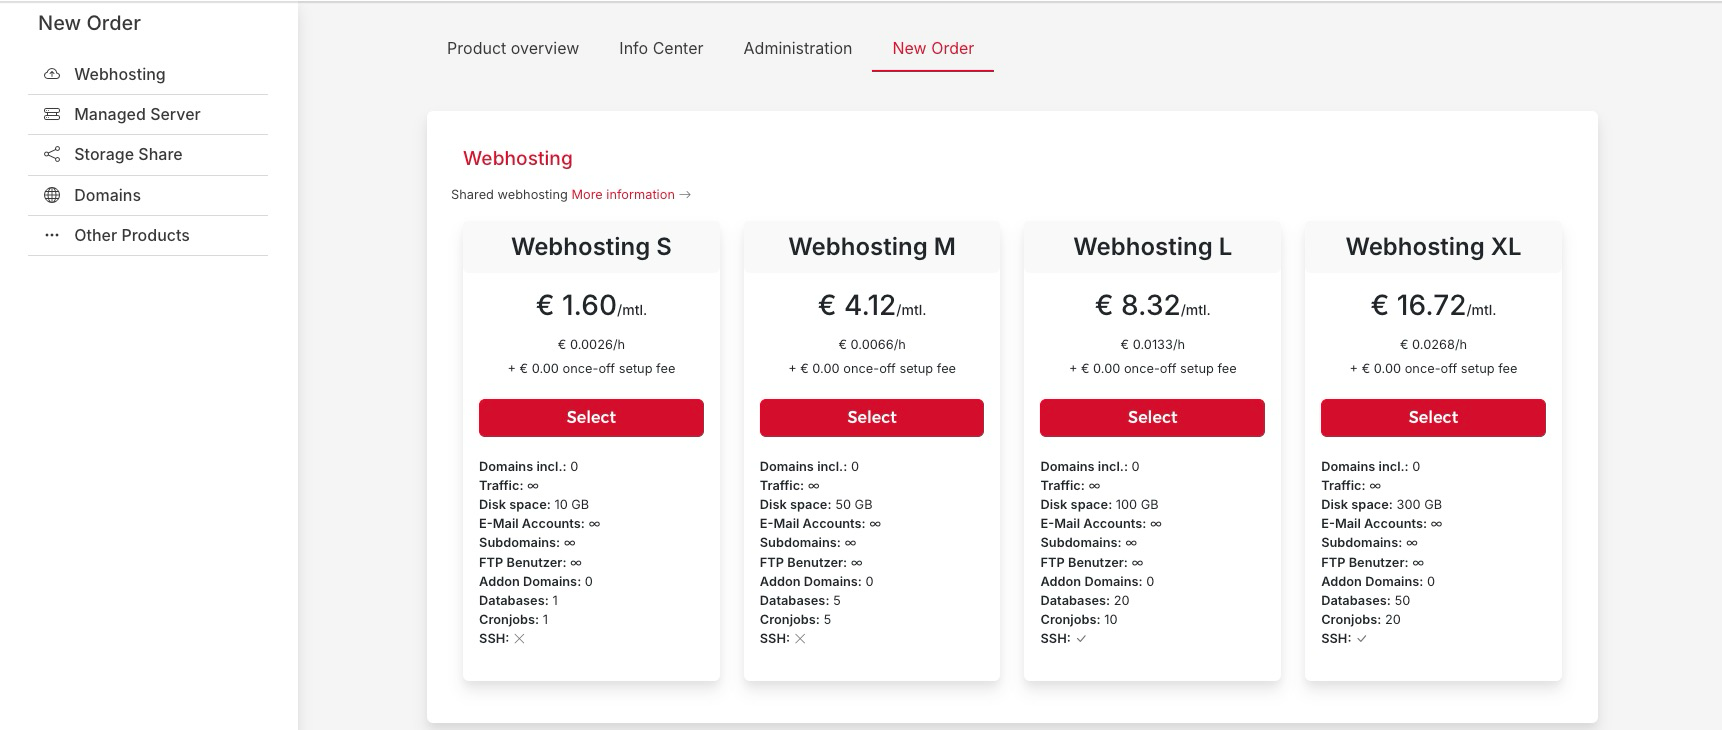
As an existing client, you can place a new order from the Konsole section, the New Order tab, and then select your desired plan.
If you want to keep the domain at the current registrar and just host it on Hetzner, you will have to select the option "I want an account; the domain will remain with the previous provider." and make the basic configuration. The Friendly Name is basically an internal label, so you can identify the account among other projects you may have and the Domain is self-explanatory.
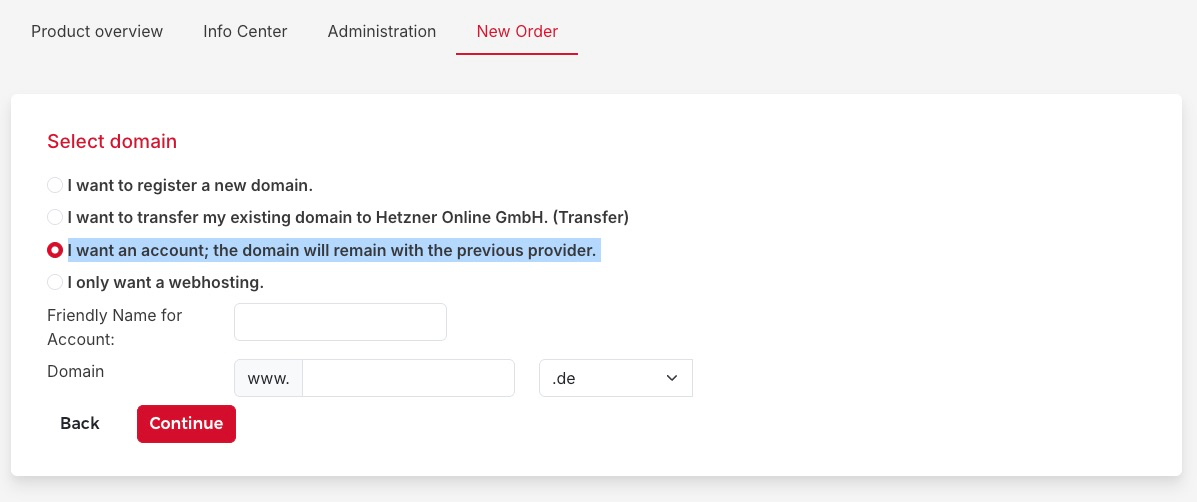
The downside is using a different registrar will add an extra 0.60 euro per month, but that's the cost of doing business, I guess. 2.20 euro monthly in total is still cheap, so not a dealbreaker for me.
Now comes the hard part: configuring the nameservers on the registrar's page. I had to dig a little for the addresses but with a little google-fu I eventually found them on this Hetzner DNS Overview Help page:
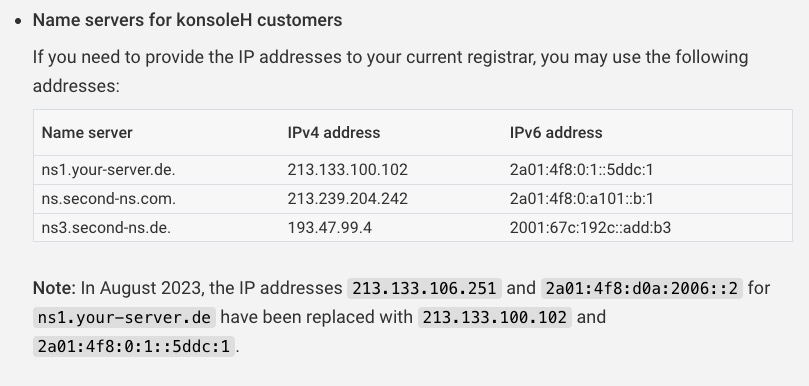
Ignore the dots at the end, those serve different purposes. The addresses you have to input on your registrar's page are these three:
ns1.your-server.de
ns.second-ns.com
ns3.second-ns.de
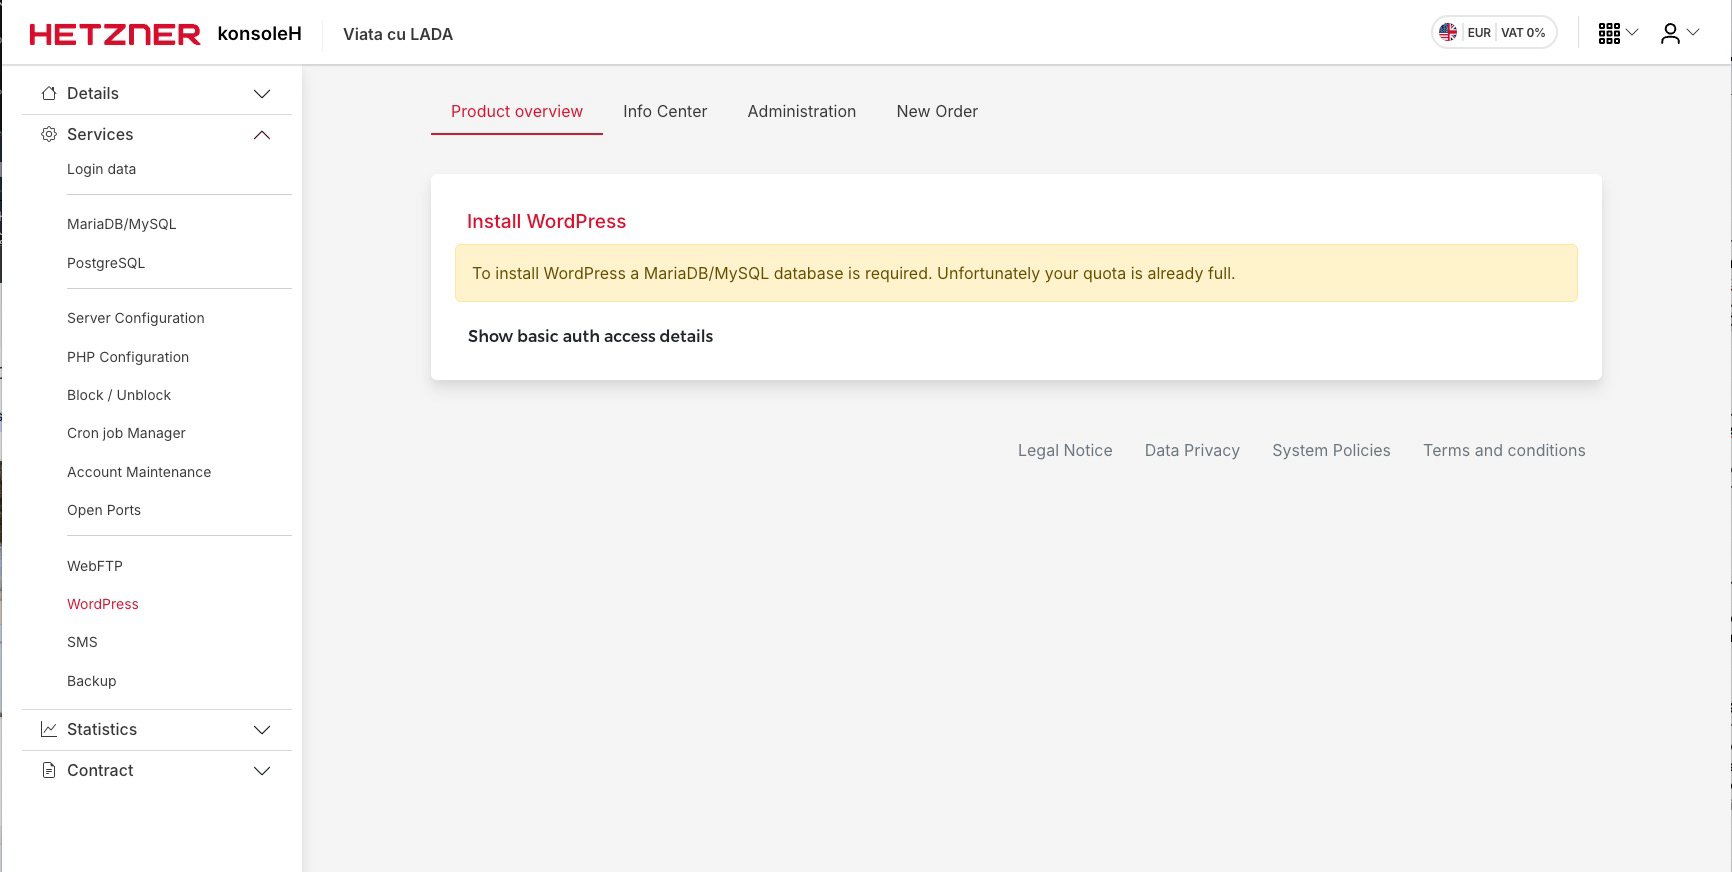
For Wordpress it's easy as pie: just go to the Wordpress section from the Services part of the menu and follow the instructions, which mainly involve setting up the blog name and the admin account credentials. Sadly, I had already completed this step so the screenshot below shows an error but at least you can see where it is in the menu.
There just one last step now, and it was the one I struggled with the most: installing an SSL certificate. It's been over 10 years since I first installed one the hard way but doing it in Hetzner required a different sort of knowledge.
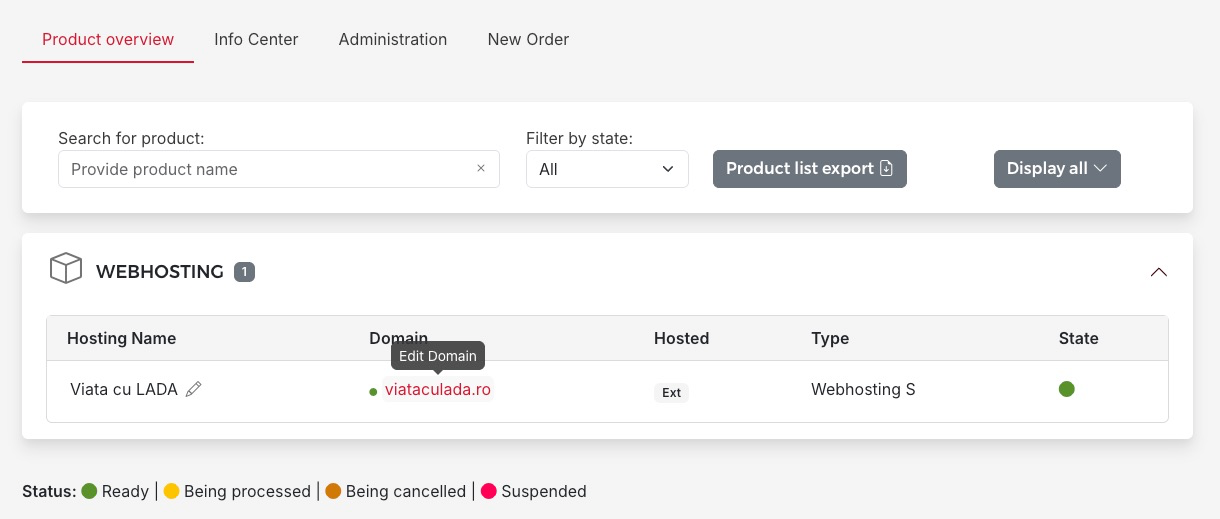
By default you will see the Web hosting options, the ones that allowed you to easily install Wordpress. In order to add the certificate, you will have to click on the domain name, from the listing page
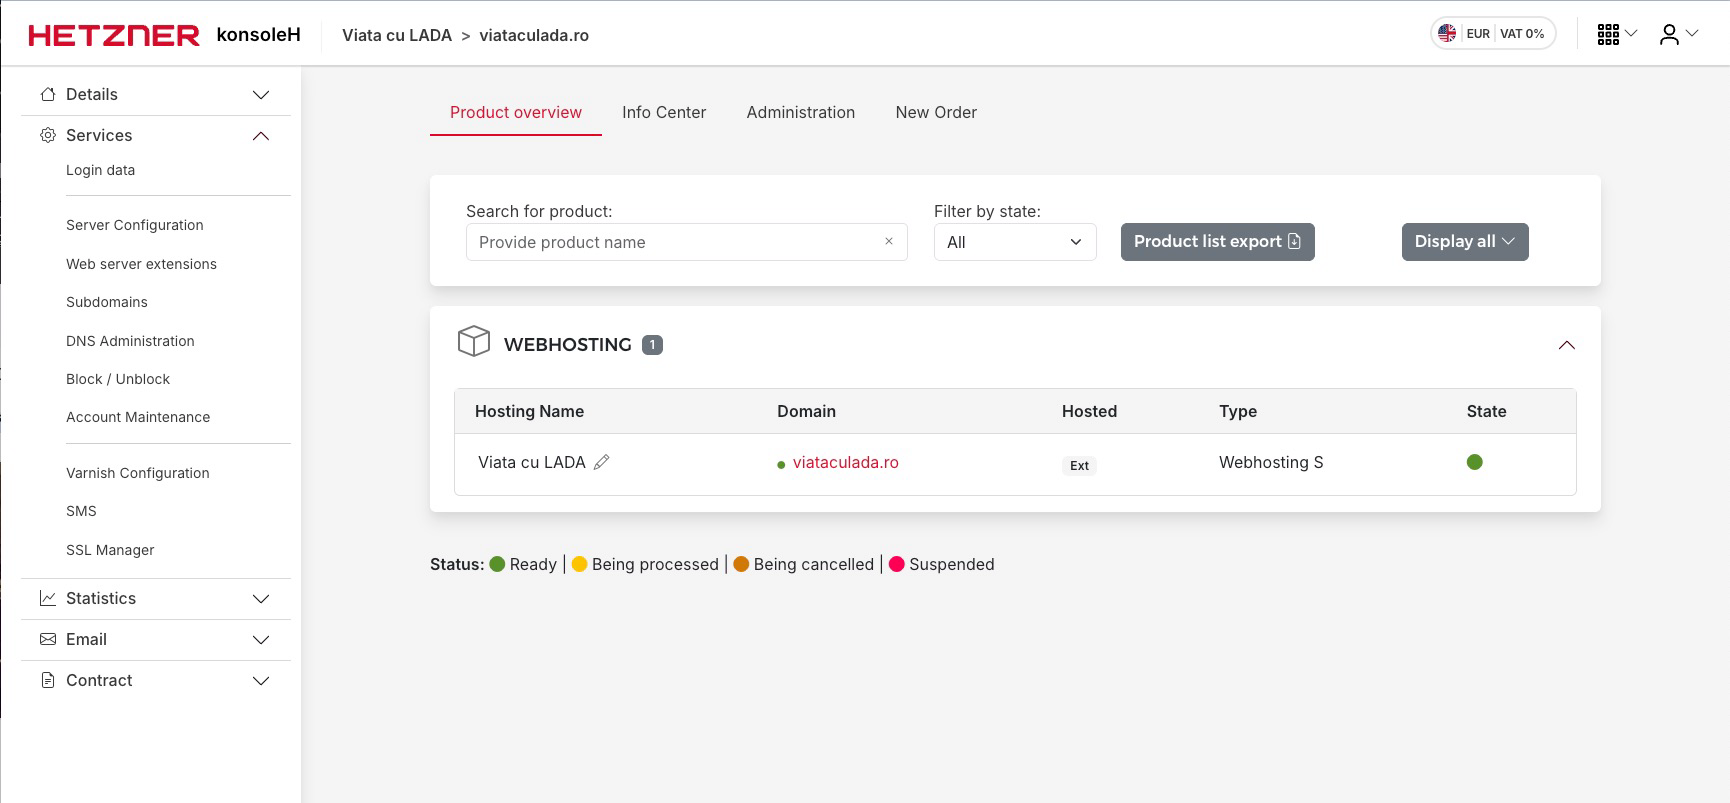
This will reload the side menu and now you'll find the SSL Manager in the
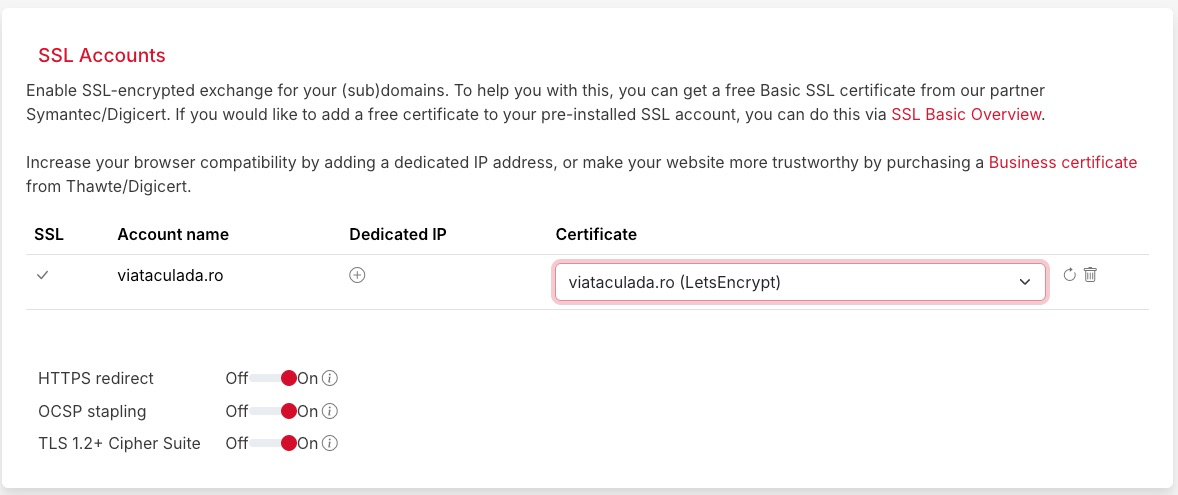
From this screen, select the LetsEncrypt option in the Certificate dropdown and then click on the refresh icon in the right (that part was not intuitive at all). In the end, don't forget to toggle on the automatic HTTPS redirect (by default it's off)
And that's it! Enjoy your new Hetzner-powered, SSL enabled, externally registrar based, Wordpress blog.